360° Content & Web VR
Week one – 360° Immersive Video
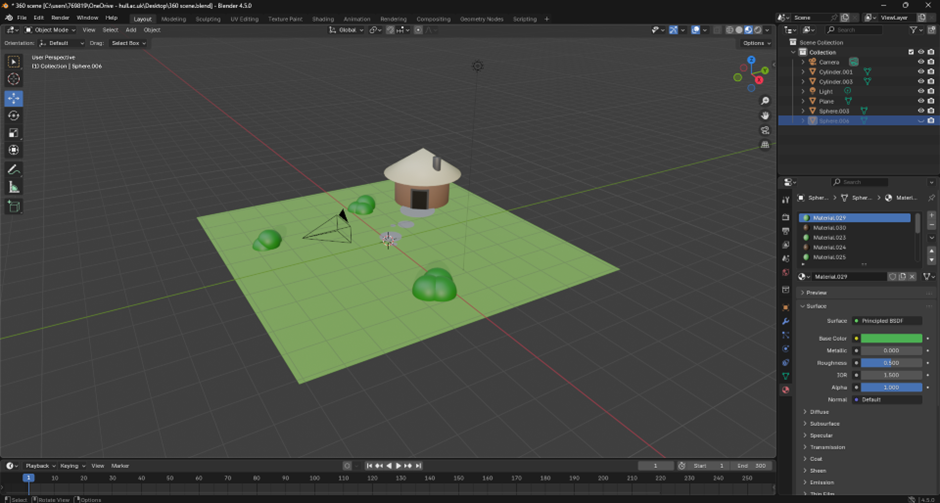
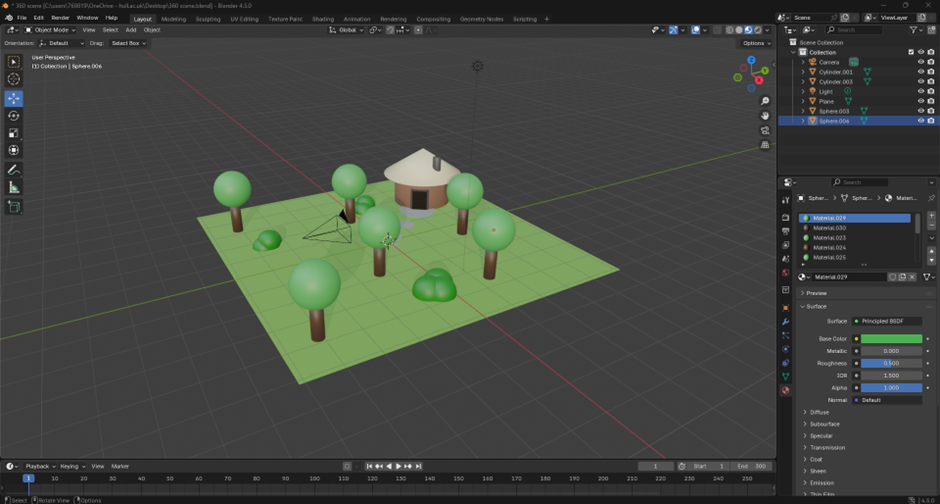
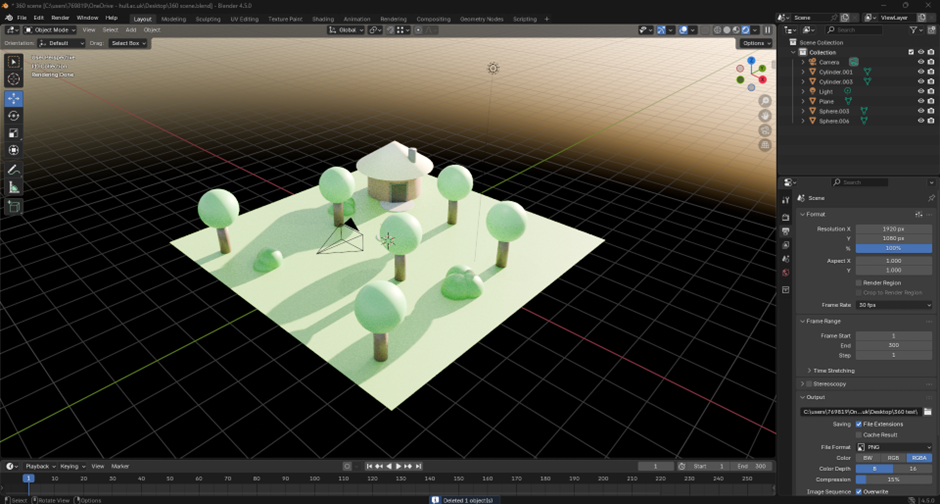
For my first exercise we were tasked with using either Maya or Blender to create a short 360 immersive video. I wanted to stick with the programme I worked best with so I settled with using Blender for this exercise and to save time I created a still 360 video, therefor the camera doesn’t move, meaning I would technically only have to render one frame. Seen as this was only a first draft idea I didn’t add much texture into my objects, basically only using solid colours to tell them apart, but with more time spent and details added this idea of a 360 video would be a great start into making an immersive film for my proposal.
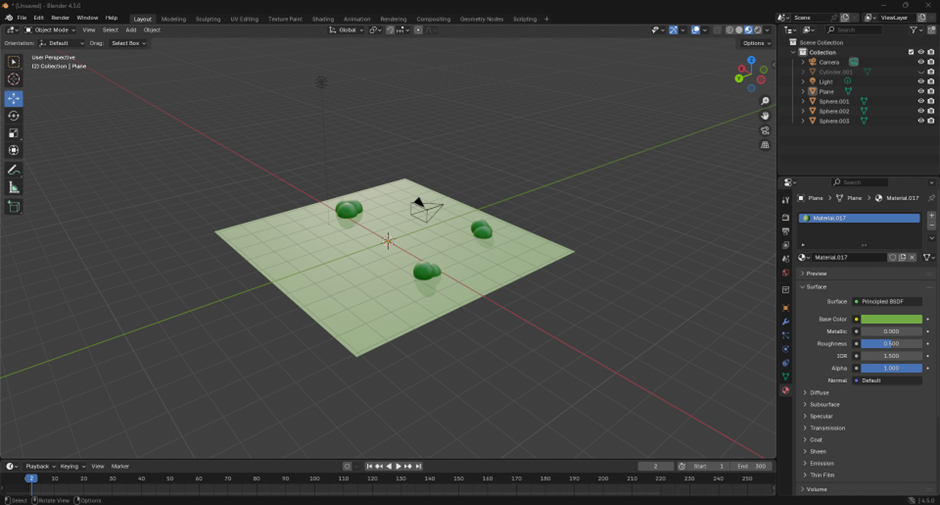
In order to create an effective light source to allow the user to see the scene I added a sky background that uses a sun instead of having to add individual light sources around the scene. However, depending on what would happen in the scene, sometimes using individual lights can work better for someone using a VR headset as they are a good indication on where the user should be looking. But instead of just using light to show the user where to look, audio guides are just as efficient. Even though I haven’t included any audio into this video it would make for a great storytelling experience for my proposal.
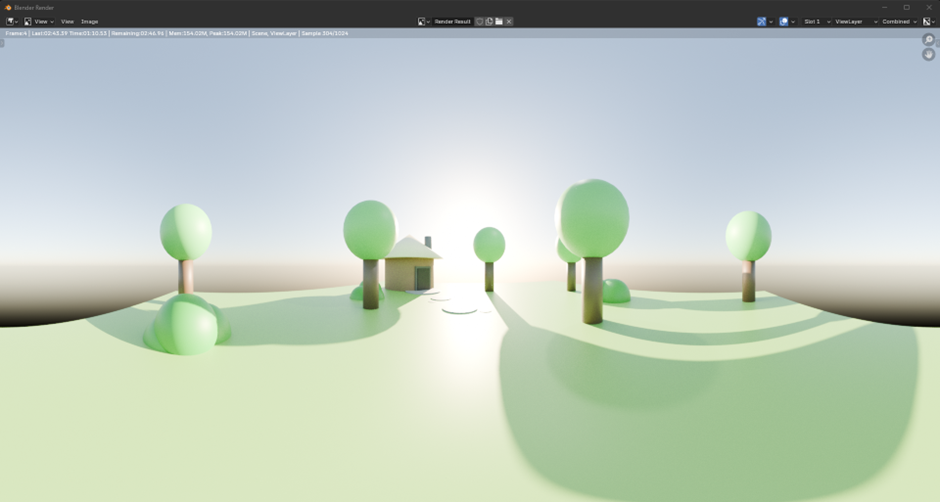
My final video is published to YouTube and worked perfectly, this 360 video allows the audience to get an understanding of an immersive experience. Even if they don’t have a VR headset they can still look around using the YouTube app on their mobile device. This 360 exercise could be used as a perfect way for Graphic Designers to present portfolios or any other series of work they have created.
Week one – Geometry Nodes
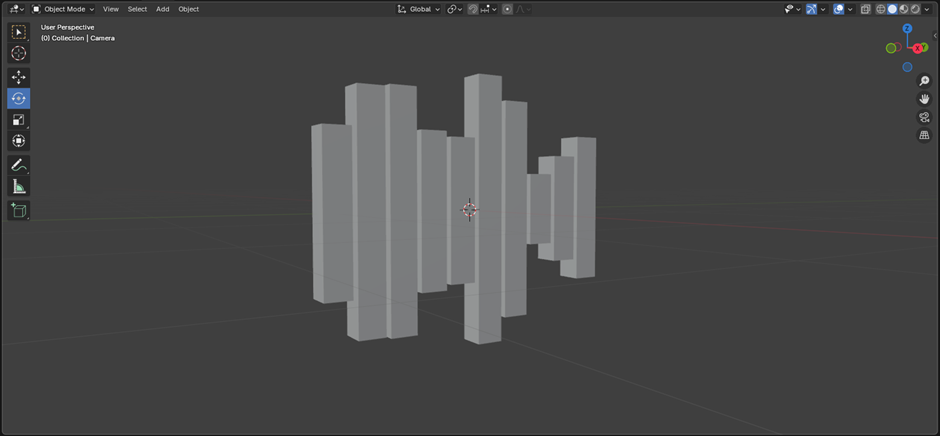
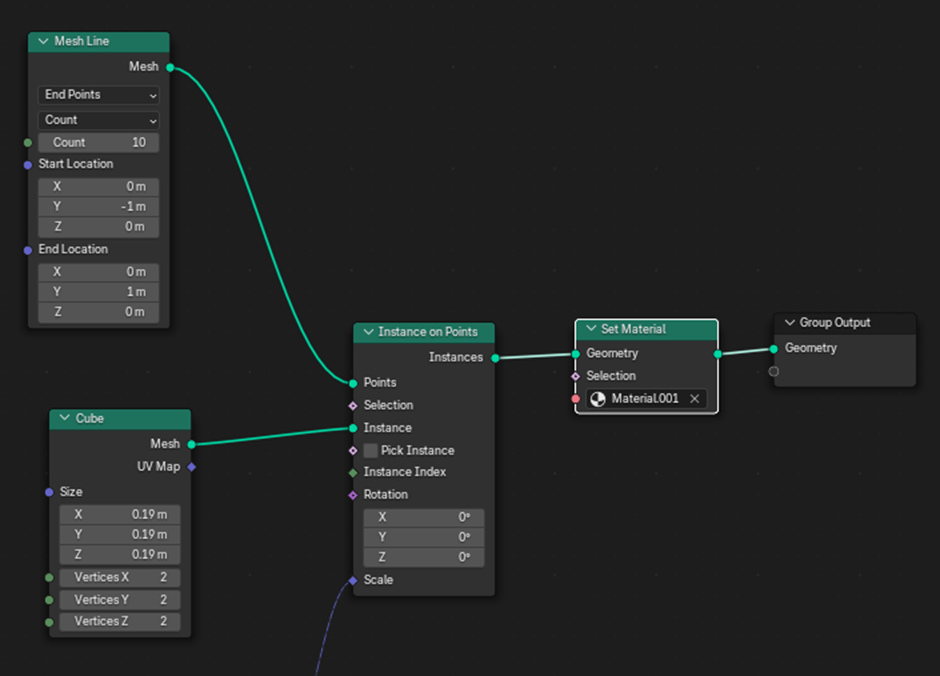
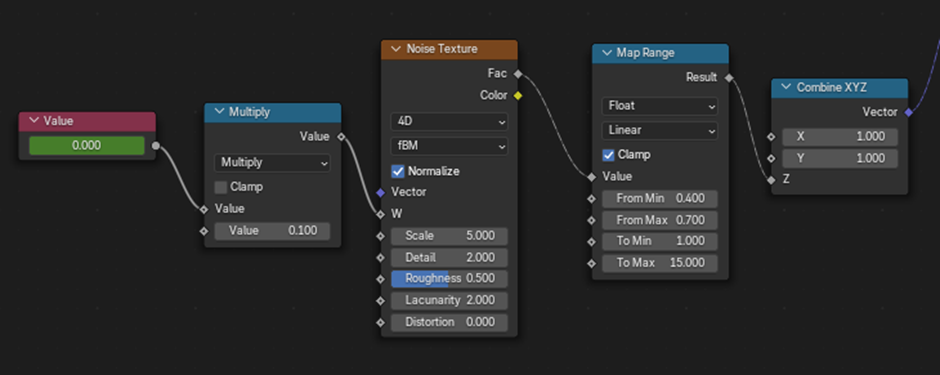
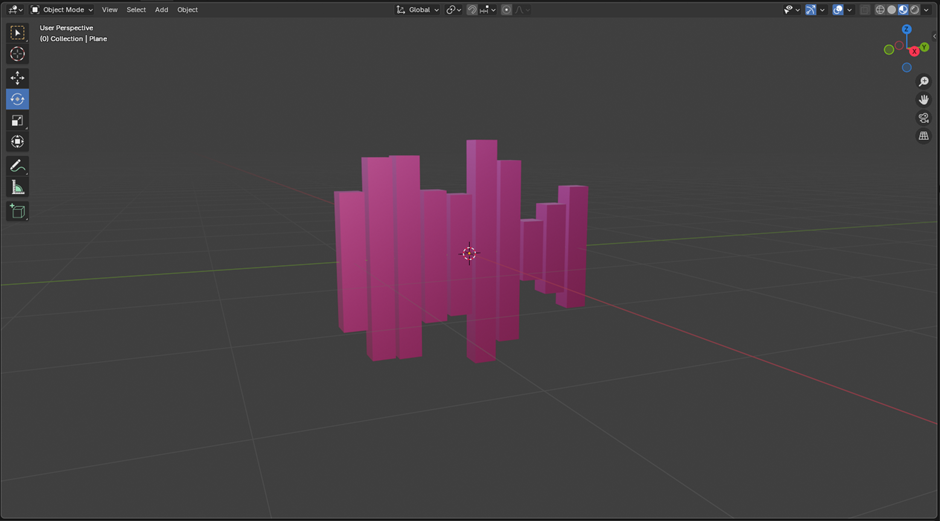
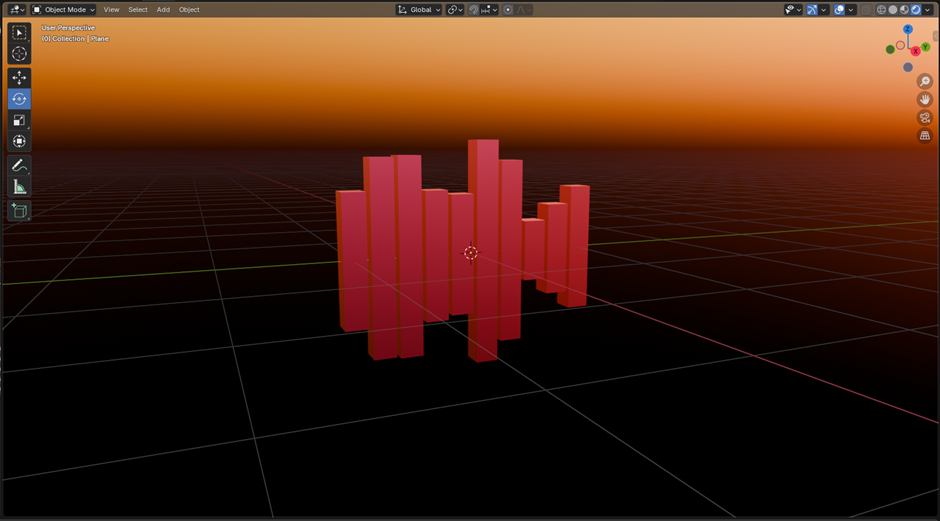
During the same week, I was given the option to create other assets that could be implemented into our 360 video. One of the tasks being the understanding of geometry nodes. Following a tutorial, I was able to re-create a simple music visual, where the blocks you see react to the music played in the background. The tutorial was simple enough to understand, and my final outcome work successfully, with only one technical issue I ran into. However, it was an easy fix as it was just down the version of Blender I was running.
Week two – Frame VR (Web VR)
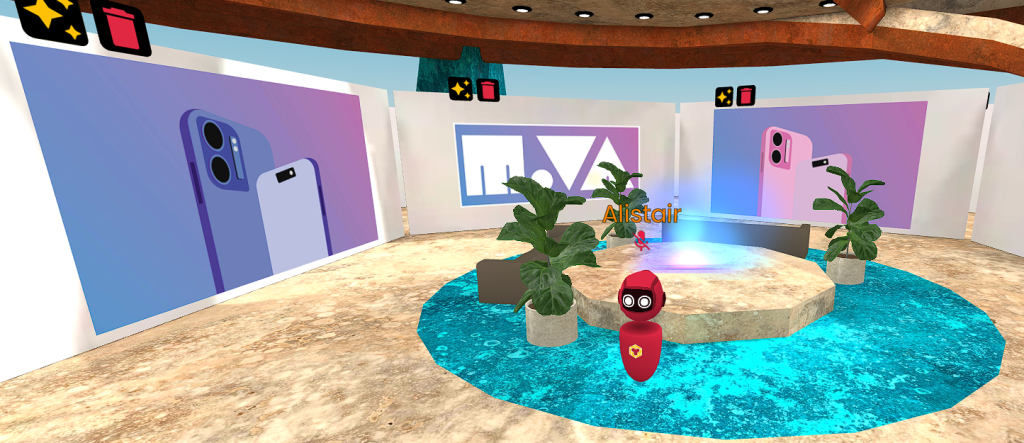
During the week two workshop I learnt about a Web VR site called FrameVR, FrameVR allows you to explore and interact within a virtual space. The site is free allowing many users to try it. Below is a section of the room I chose to add some of my last year’s work. FrameVR gives the users a simple step-by-step guide to help you understand the editing process to import anything you want into your virtual space. Even though I only added a few images of my work and some 3D pre-made assets supplied from FrameVR, I was apple to create a simplistic looking space that can be a great spot to present more of my work for my portfolio. FrameVR allows much more than just images to be uploaded, if you want you can also import videos and even 3D models you make in blender.
https://framevr.io/aconnertest
Augmented Reality & UX
Week three – 8th Wall
For our third week workshop I studied Augmented Reality & UX. I tried another new online program called 8thwall. 8thwall is a web-based development platform owned by Niantic, which allows users to create an augmented reality experience that work in a browser across all devices. I took part in two of the 8thwall exercises for this assignment to get a brief understanding of this programme. The first understanding 8thwall’s physics system and the second learning how to create image tracking.
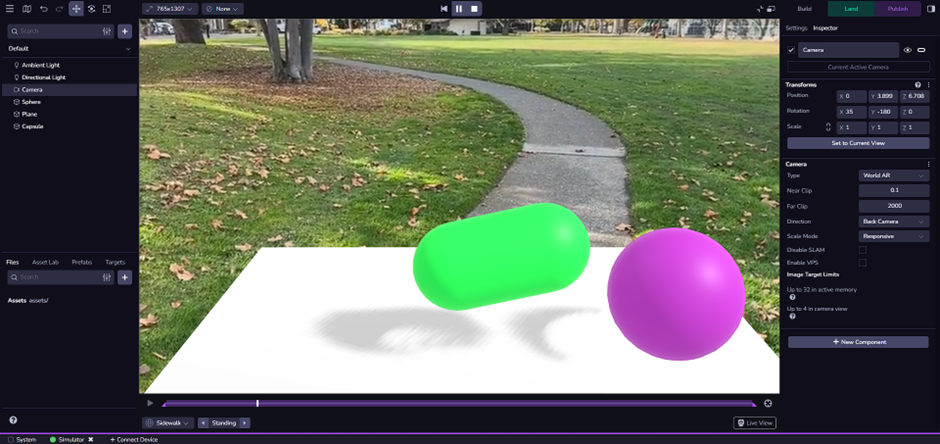
Making this physics tutorial was easy enough, and I would surely be able to create something more complex with more time spent in for my proposal. This experiment would also be able to link towards my image tracking, were once the user scans the image this physics animation would play through and appear on their device.
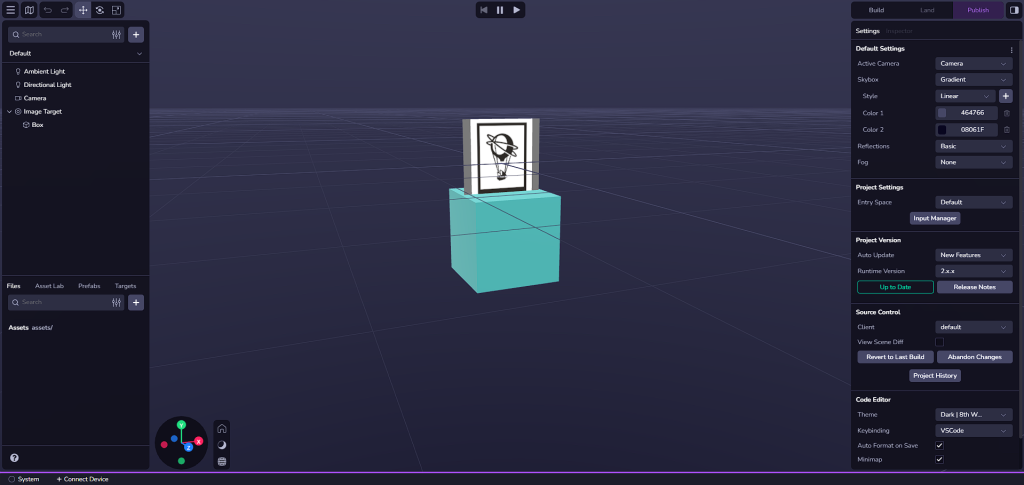
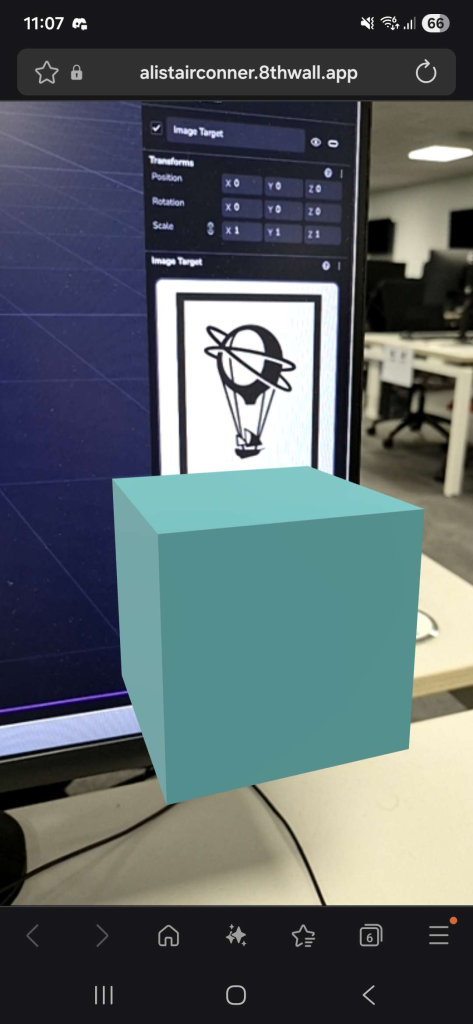
After completing the image tracking tutorial and have it successfully working it gave me a better idea of the possibilities 8thwall has to offer. From this design features I would be able to import multiple pre-made assets from other software’s all to be presented in one spot in the real world. And as a Graphic Designer that would be another effective way to build up a portfolio.
Week four – VR Art & Immersive Storytelling
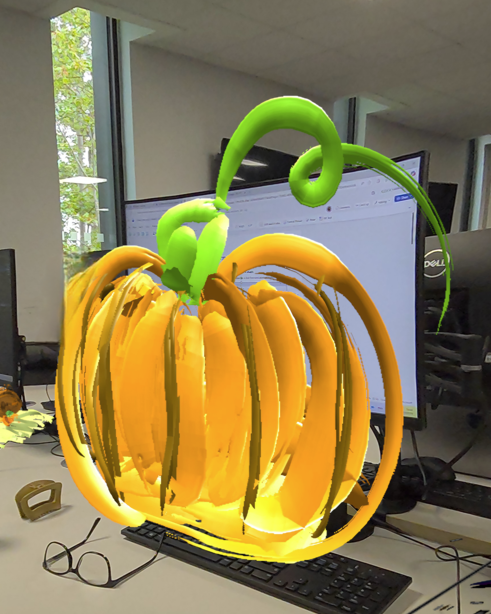
For our fourth week I explored the immersive world of Virtual reality. And for this assignment I focused on VR art, so using a free application called OpenBrush I was able to create a couple small pieces of artwork. This wasn’t my first time using a VR headset and I know for others it can be quite disorientating. Luckily for me I don’t have much of an effect wearing one and I was able to spend a bit of time creating these artworks and learning the possibilities OpenBrush has to offer. One issue I had though was I kept naturally trying to draw in a 2D style, forgetting I have a huge area of space, I kept my artwork relatively small and flat-like.
This was the first piece of art I had made. At the beginning I struggle with making it 3 dimensional, and I kind of forgot I even could as I am so use to 2 dimensional drawings. However, once I had the initial shape of the pumpkin I was able to round it off at the front and when you now look at from a side profile you can see that it is indeed 3 dimensional.
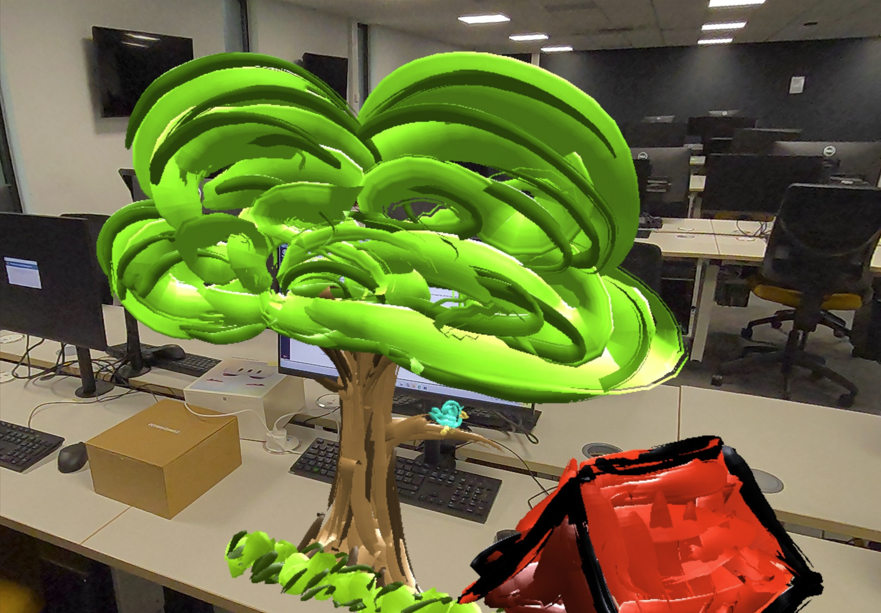
My final piece of artwork I created using the VR headset was slightly bigger than the last. Even though on OpenBrush you have the tool to scale your artwork, I wanted to get in the groove of designing something bigger as for my final outcome I might. I started with creating a tree, trying to give it as much realism as I could but also stay within the cartoon-like colours. Once I had that drawn I wanted to make it more of a three dimensional scene so I added more of a landscape by painting a tent to the side of the tree. Once I fully understand the possibilities I have within OpenBrush I feel like it would be a great emerging technologies to use for my final outcome. Especially since vie always enjoyed drawing and would be up for trying something I’m not so use to.
PART TWO: Research Proposal: Crafting Your Emerging Research Project
Research Overview
For my project, I want to incorporate a couple of emerging technologies I have learned over the past few weeks. I want to use a VR headset to create a three-dimensional, graffiti-style mural that can be exported and placed within the 8th Wall browser software to appear as image tracking within the real world. So my intentions is to create a large piece or artwork in the style of graffiti in virtual reality. I have been experimenting previously with OpenBrush, however there are many other apps that I could possibly try given the time I have. I will then export my artwork into 8thwall where I can create a simple yet effective image tracking. And in order for the image tracking to actually work I will have to create some form of design asset my audience will be able to scan and view my artwork. This could be an advertisement/ poster design I could easily create using Adobe Illustrator.
My main inspiration behind this project comes from a couple of art styles I have seen in some animated movies and series I have watched. One of those is a very popular franchise: the comic-styled Spider-Man films, especially the first one, “Spider-Man: Into the Spider-Verse.” During the film, the main character Miles Morales creates a graffiti mural with an outline of him in the middle and the words “no expectations” behind the outline.
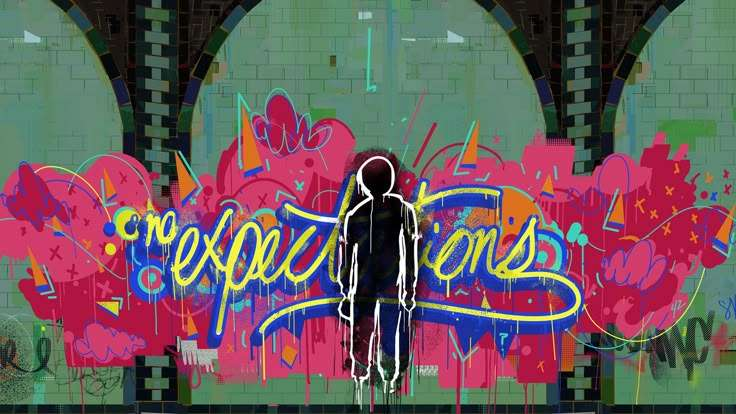
The mural serves as a visual representation of Miles’s internal conflict, his transition from a confused teenager to a confident hero who creates his own destiny, rather than simply fulfilling the destiny that others have mapped out for him. This symbolism is know as impostor syndrome. Impostor syndrome is a psychological pattern of doubting your accomplishments. And if a percentage of my target audience was too relate to this issue, hoping the artwork I create could help in any way. Another feature I like in this mural is the use of colour and shapes. Both features fit perfectly and I believe creating something like this in virtual reality could be quite the experience.
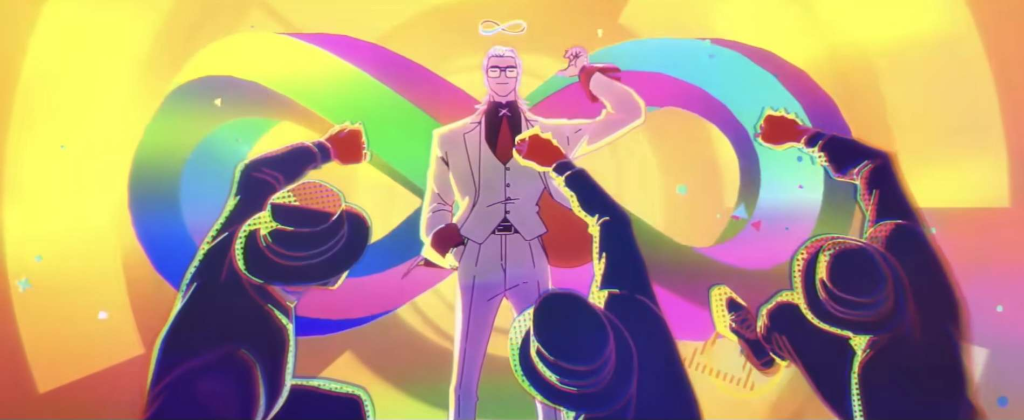
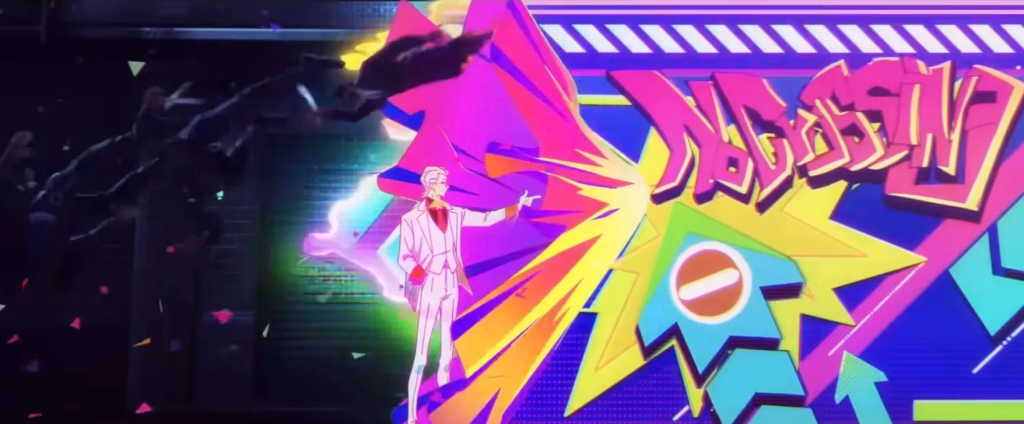
Another style of art I am inspired by is the use of colour and visual effects used in the animated series “To Be Hero X” (TBHX). This anime is particularly unique unlike others as it varies in art styles throughout the episodes. Each character have their own individual art style whilst when they all unite together they end up falling under a more three dimensional form. Either way all the different styles pop out to me and I feel like I can use one like that within my own work. I am heavily inspired by the use of colours in some of actions shots within TBHX and would definitely want to incorporate that in some way.
The target audience for this will be people who have a passion for art and since I’m using AR it will probably be aimed towards a younger generation rather than an older one. AR can work great within Graphic Design however not everyone will understand how it works and how to use it. Hoping the newer generations of audience would as they have grown up and have a clearer understanding of this technology.
References
Ramsey, P. Rothman, R. Persichetti, B. (2018) Spiderman Into the Spider-verse [motion picture] (Accessed: 30 October2025).
Haoling, L. (2025) To Be Hero X [motion picture] (Accessed: 30 October2025).
Project Plan and Milestones
Milestone 1 – Choose what I want to create for my final outcome
Milestone 2 – Research and references
Milestone 3 – Create some concept assets/ initial rough sketches
Milestone 4 – Create first half of my project in OpenBrush and Adobe Illustrator
Milestone 5 – Export artwork into 8thwall for the second half of my project
Milestone 6 – Finalise any small details before submission date
User Stories
User stories help agile development teams keep the focus on the end-user. The team understands the user’s needs and the value that the feature will provide. This understanding guides discussions, prioritization, and decision-making throughout the development process. They’re meant to be placeholders for a conversation. During planning or refinement, the team discusses the story with the product owner or stakeholders to clarify requirements, acceptance criteria, and potential solutions. This approach ensures that everyone is on the same page and that the final product meets the user’s needs wants and values. User stories also enable iterative development and large features can be broken down into smaller.

Tools
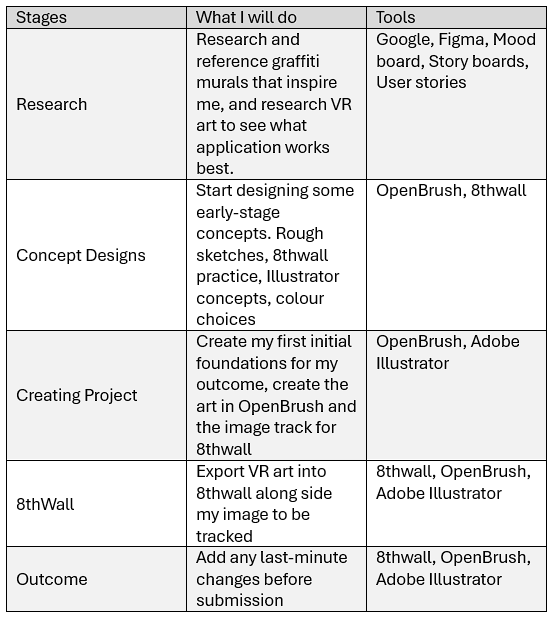
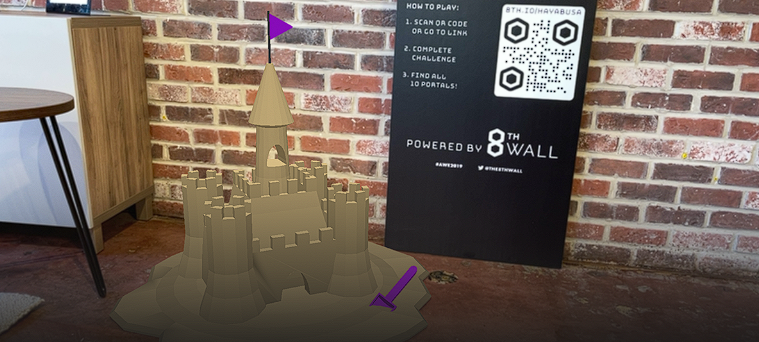
One of my main tools I shall be using for this project is OpenBrush. Open Brush is a free, open-source 3D painting application that allows users to create art in virtual reality (VR) and mixed reality (MR). It is an open-source evolution of Google’s original Tilt Brush application. Users can paint in three-dimensional space using a wide variety of effects and brushes, such as light, fire, and smoke, treating their virtual or physical environment as their canvas. Users also have the option to paint fully in the virtual canvas or through the VR’s passthrough, that allow the users to still paint and see the real world around them thanks to the VR’s cameras capability. OpenBrush also allows you to export your artwork into a variety 3D of file formats such as FBX, OBJ, GLTF/GLB, USD, STL, and WRL. It can also export to JSON for raw data, and LATK for 3D brush strokes. For still images, it can create snapshots or GIFs of the sketch. These file formats will work perfectly for my other tools I shall be using for this project.
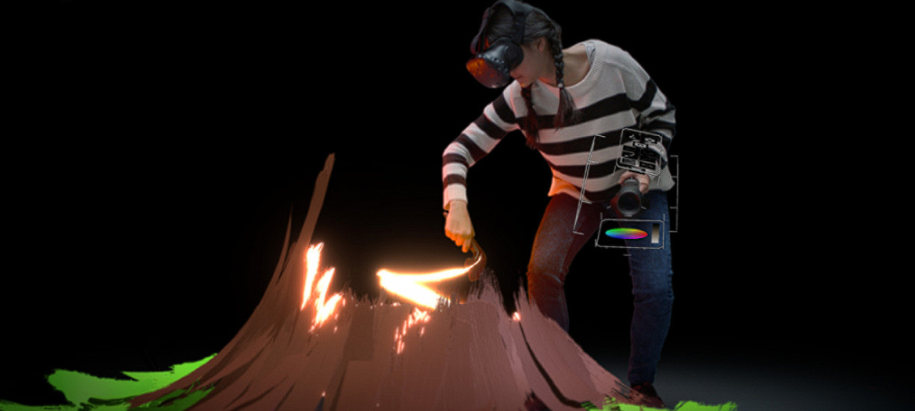
Another Tool I shall be using is called 8thwall. 8thwall is a web-based augmented reality (WebAR) platform that allows developers to create interactive AR experiences that run directly in a web browser, eliminating the need for a dedicated app. Acquired by Niantic in 2022, the platform provides tools for developers to build and publish these experiences across various devices, from smartphones to AR/VR headsets, reaching billions of users. Users can freely access AR content directly through a website, making it seamless and accessible without an installation process, simply by scanning a QR code. 8thwall shall be my tool that presents my final outcome, it will supply the user with a QR code that will then allow them to scan my designed poster, letting the 3D artwork I made in OpenBrush to present on their phone in the real world.
The final tool I shall be using in this project is Adobe Illustrator. I am already quiet confident in using Illustrator as I have been through my two years already doing this course. But my plan is to create my advert poster that shall be used as my image tracking for 8thwall. I may also have to use Adobe Photoshop depending on if I have to do any image manipulation.
Concept Storyboard

Here is my rough storyboard I created with some quick sketches on some paper. This board is suppose to resemble the use of my project and how something so simple could be taken further by other artists.
Slide 1 – Slide one shows a rough example on what my poster would look like for the image target to work. It would have some form of image of the project presented whilst having to have the QR code also presented allowing the users to scan and see the final product.
Slide 2 – Slide two shows the users phone that would have scanned the QR code which may also follow up with some advertisement/ information about the art piece. No application required to view.
Slide 3 – Slide three is the 3D artwork that would be presented into the real world. The user shall be able to walk around this model to see every last detail about it.
Slide 4 – Slide four is a representation of the user speaking out about the artwork they have seen, and their understanding on just how easy it is to create something like that, the word would hopefully go out and connect with slide 5.
Slide 5 – As slide five is meant to show that more people have decided to go out and create their own artwork and present it the same way via 8thwalls image tracking features.
Reflection & Emerging Tech Justification
The first emerging technology I chose for this assignment was the use of virtual reality art. Virtual Reality (VR) art stands at the exciting intersection of technology and creativity, marking a significant leap in how art is conceived, created, and experienced. As an emerging technology, VR is not just a futuristic concept but a tangible tool that is rapidly evolving, thanks to continuous advancements in hardware, software, and network capabilities. These developments are making VR more accessible, immersive, and applicable across various sectors, thereby transforming our interaction with digital and physical environments. Early VR headsets were often bulky, expensive, and offered limited resolution and tracking capabilities, which lowered the artistic process. However, advancements in display technology have taken to higher resolution screens with faster refresh rates, providing artists with a clearer and a more responsive canvas.
The applications of VR art are expanding beyond the traditional art world, VR art can provide students with immersive learning experiences, allowing them to explore historical sites, dissect anatomical models, or create virtual prototypes. In healthcare, VR art can be used for therapeutic purposes, such as pain management, rehabilitation, and mental health treatment. In manufacturing, VR art can aid in the design and visualization of products, allowing engineers and designers to collaborate on virtual prototypes before committing to physical production.
These developments make VR more immersive, accessible, and integrated into daily life and professional work, transforming how users interact with digital and physical environments. Because I am hoping to create my graffiti style mural in a free application called OpenBrush once that is created I will have the choice to exported to the specific file format to allow it to be placed into 8thwall (my second chosen emerging tech).
The other emerging technology I have chosen for this project is 8thwall, I chose this because 8thwall provides a designer with multiple way to design and present their work. Specifically speaking about Image tracking. Image tracking is the process of a device recognizing and locating a specific, real-world image to overlay digital content on it such as a 3D model for example. It uses a device’s camera to identify a reference image, such as a poster or a product label, and then uses that image’s position and orientation as an anchor for the virtual objects to appear in the correct place. For example image tracking can be used in all sorts of design industries such as Marketing, Gaming, Retail and Education. I specifically chose 8thwall because as a Graphic Designer I have used nothing like this before and would like to explore it further for my future plans. I’ve seen a couple of graphic designers use this technique of design but it certainly isnt as many as people think. Audiences tend to see this style of design and automatically refer to it more towards game design, especially due to the popularity Pokémon GO built up on its release as that uses AR to play the game if the users would like. Whilst graphic designers may use these software’s to present future portfolios.
0 Comments